
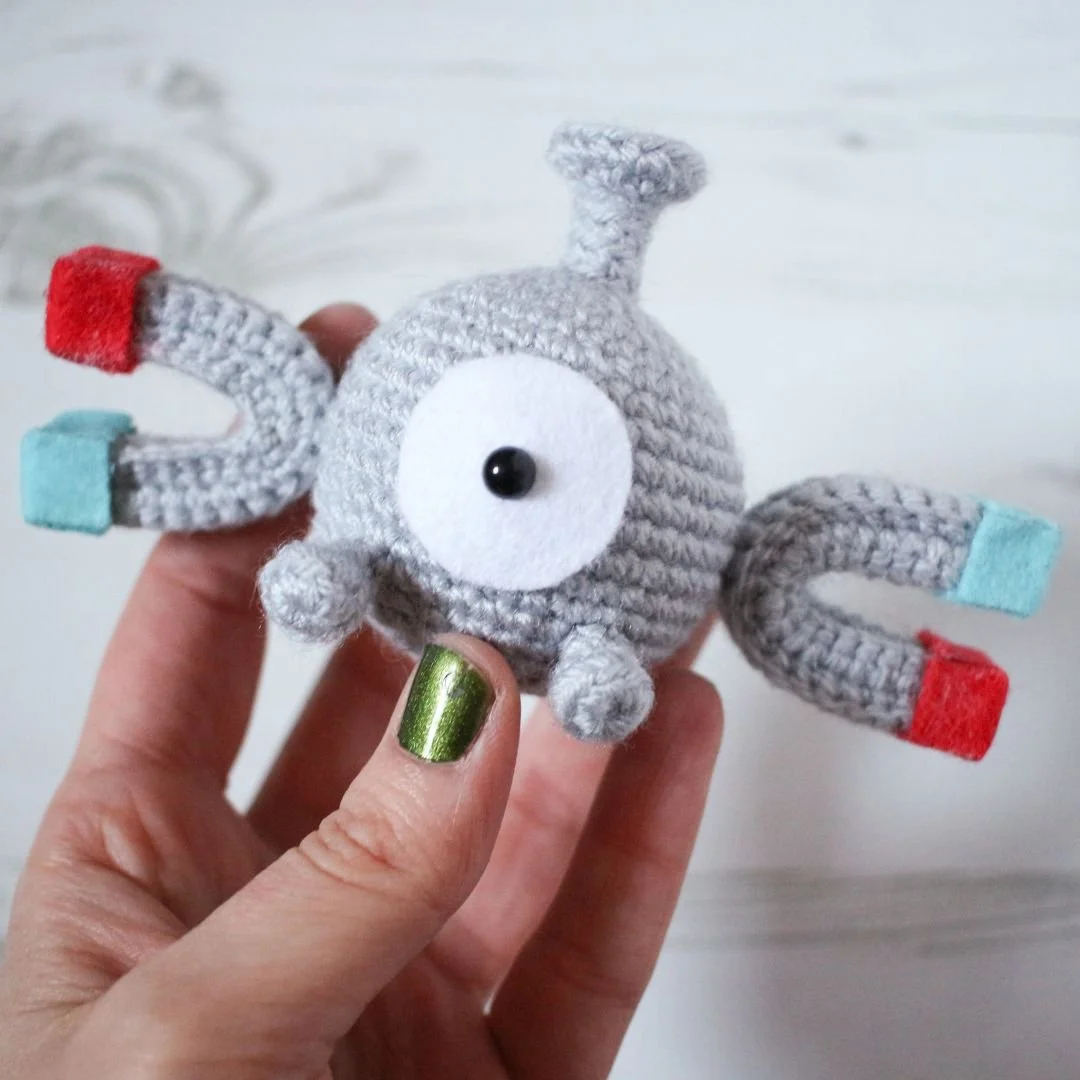
Magnemite Amigurumi Pattern
I’m so excited to finally share my Magnemite pattern with you. I made this amigurumi all the way back in late 2022, so it has taken me quite some time to finally put these videos together. I actually filmed the first part of the pattern in April last year, but I got so preoccupied with how I wanted the rest of the visuals and graphics to be, etc... So long story short: we are finally here!
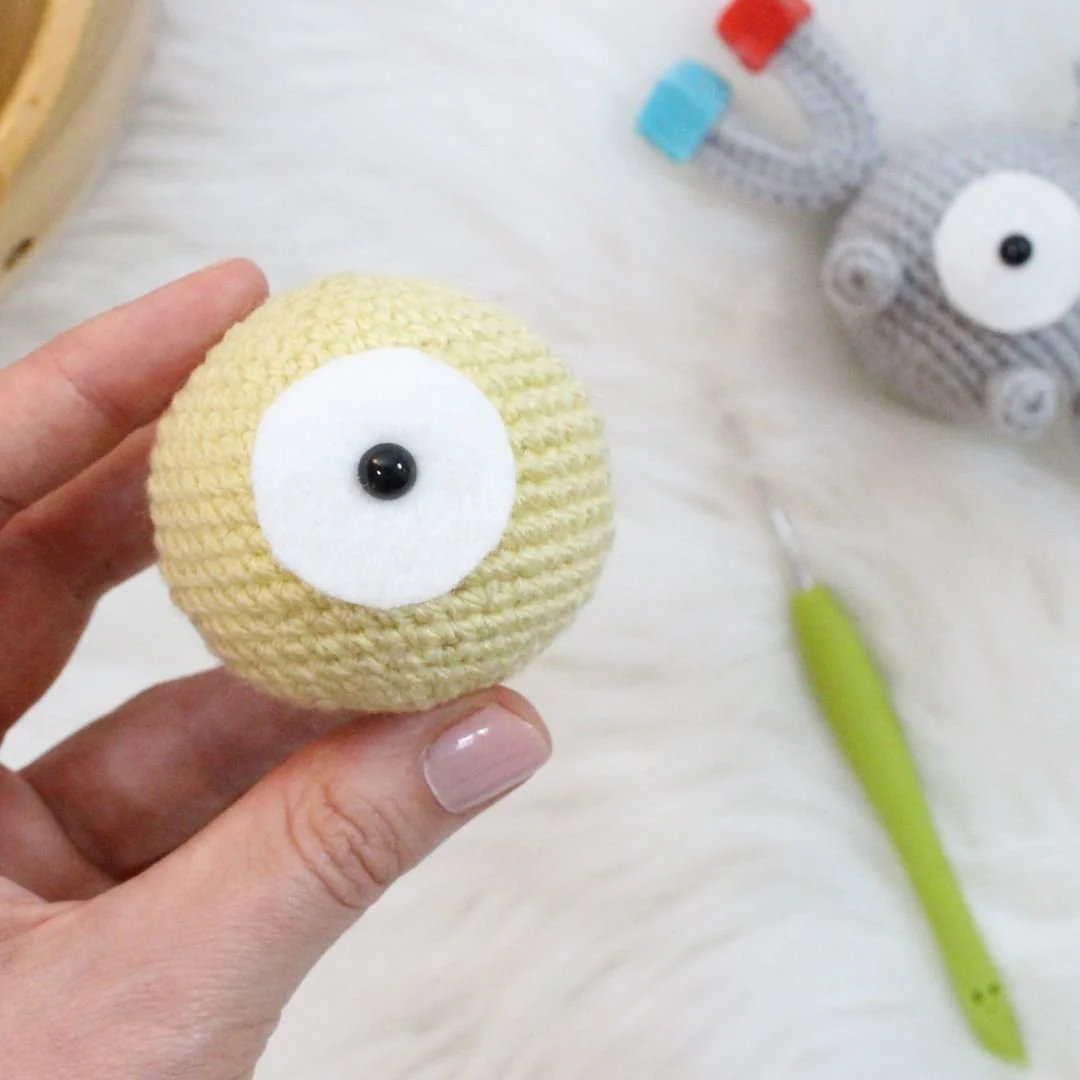
For whatever reason I rarely crochet my Pokémon more than once – unless it’s a shiny. So it made sense to make a Shiny Magnemite for the tutorials so that I have one in each colour. I obviously forgot that the shiny version has black edges on its magnets when I was making my video, so keep that in mind when you make yours.
The pattern consists of three YouTube tutorials:
Part 1: Head/Body (Sun, 4 February at 17:00GMT)
Part 2: Magnets (Sun, 11 February at 17:00GMT)
Part 3: Screws & Assembly (Sun, 18 February at 17:00GMT)
Once all the tutorials are published on YouTube, I will be posting the written pattern underneath each section of this post.
If you would like to see more of these patterns, I would really appreciate your support over on my channel. I have a huge backlog of patterns I haven’t shared yet, so there’s lots more fun to be had.
Before we get to the tutorial, let’s cover some of the important details you will need to create your own Magnemite.
YARN & HOOK
2mm hook
Stylecraft Special DK in Silver (Shiny Magnemite: Buttermilk and Silver)
1 x 6mm Black safety eyes
Wire – I use a 1.2mm jewellery wire. It was the sturdiest, but also bendable, option I could find at my local craft store
White, Red and Blue felt (Shiny Magnemite: White and Black)
Scissors
Toy filling
Clear PVA glue or a glue gun*
Pins to place pieces together before sewing
Darning needle
Stitch markers (I prefer using scrap yarn as “stitch markers”)
*I have some thoughts on PVA glue v glue gun I wanted to share... I used clear PVA glue when I made my original Magnemite, and I’m not going to lie... It was tricky. You’ll be folding the felt around the edges of the magnet. In my case the felt didn’t want to stick to the magnets, and I ended up oversaturating the felt with even more glue, and then it definitely wouldn’t stick or dry. I ended up holding the felt in place for what felt like an age. Eventually it was done, but you can tell from the pictures that the felt had been drenched in glue... When I filmed the tutorial, I used my new glue gun. Whilst it was a bit on the messy side since I’m still new to this little gadget, it dried super quick and with a bit of practice I reckon this is going to be my new favourite glue to use.
So choose your glue wisely! And felt is like a sponge, so don’t oversaturate.
SIZE
Magnemite is approximately 6.5cm tall (that’s including the top screw), and 13cm in width (including the magnets), and approximately 5cm from front to back.
Weight: 21 grams (this includes all materials used to make Magnemite)
STITCHES & ABBREVIATIONS – UK ENGLISH
ch chain
dc double crochet
bldc back loop double crochet; working your double crochets in the back loops only
st/sts stitch/es
inc increase; dc 2 in one st
dec decrease; insert hook in the front loop of the next two sts, yarn over, pull through both loops, y.o. and pull through remaining two loops. This is also referred to as an invisible decrease.
y.o. yarn over
ws wrong side
rs right side
ASSEMBLY
I would recommend using a photo of Magnemite from the games as reference for best possible outcome. My main source of inspiration comes from PokémonGo, so I like to screenshot the Pokémon I’m making from all angles and use that as a reference. Pin all the pieces in place before sewing to make sure it looks right. I attached the top screw first, then the two smaller screws, and the magnets last. When all the crocheted pieces are attached use my glue gun fasten the white felt.
THE PATTERN
PART ONE | HEAD/BODY
PART TWO | MAGNETS
PART THREE | SCREWS & ASSEMBLY
THANK YOU & ENJOY!
Please do not reprint, sell or claim the pattern as your own.
I’ve loved creating this pattern so please don’t forget to credit the pattern designer.
I would love to see your creations! Please remember to tag me in your social media posts and use the following hashtag #loopycathrineamigurumi
For any questions about the pattern, please comment below and I will do my best to help.